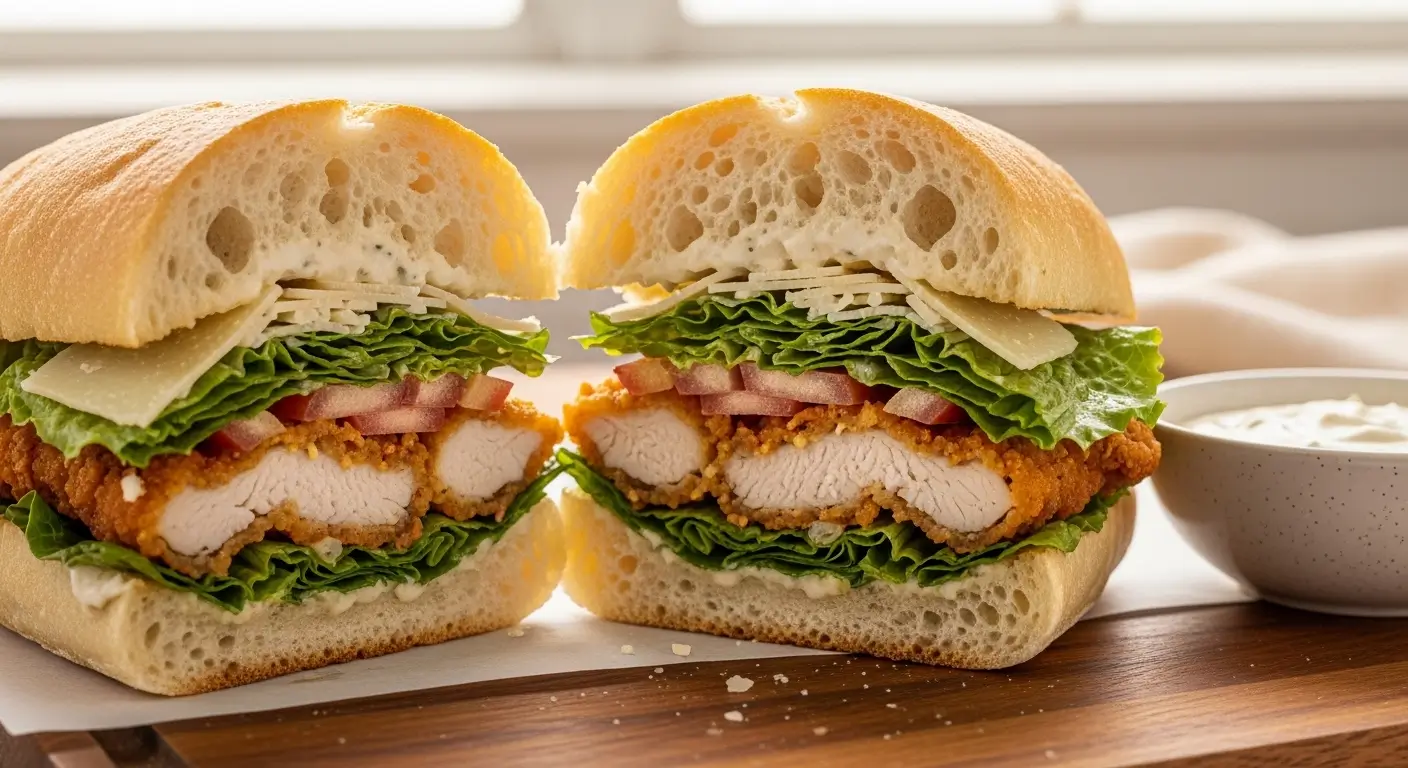
Crispy Chicken Caesar Sandwich
You know that moment when you order a chicken Caesar sandwich, take one bite, and think… meh? The chicken feels soggy, the lettuce looks tired, and the sauce tastes like it came from a sad squeeze bottle. Yeah, we don’t do that here.
Today, I’ll show you how to make the best Crispy Chicken Caesar Sandwich at home — crunchy, juicy, creamy, and honestly better than takeout. I’ve tested this more times than I’ll admit (purely for research, obviously), and this version wins every single time.
Ready to upgrade your sandwich game?
Why This Crispy Chicken Caesar Sandwich Beats Takeout
Let’s be real. Most takeout versions cut corners. They rush the chicken. They drown the lettuce. They use bland dressing.
When you make it at home, you control everything:
- Ultra-crispy chicken with real seasoning
- Fresh romaine lettuce with actual crunch
- Homemade Caesar dressing with bold flavor
- Toasted, buttery bread that holds it all together
Ever wondered why restaurant sandwiches sometimes taste flat? They skip seasoning layers. We won’t.
IMO, the magic comes from contrast — hot crispy chicken + cool creamy dressing + crisp lettuce + soft toasted bread. That balance makes every bite ridiculous.
The Secret to Ultra Crispy Chicken
Why Breading Matters
If your chicken turns out soggy, your breading failed you. Simple.
I use a double-dredge method because it locks in crunch. Flour gives structure. Egg helps everything stick. Seasoned breadcrumbs create texture.
Want that golden crust that shatters when you bite into it? This method delivers.

Ingredients for the Crispy Chicken
- 2 large boneless, skinless chicken breasts
- 1 cup all-purpose flour
- 2 eggs
- 1 tablespoon milk
- 1 ½ cups panko breadcrumbs
- ½ cup grated Parmesan cheese
- 1 teaspoon garlic powder
- 1 teaspoon paprika
- ½ teaspoon salt
- ½ teaspoon black pepper
- Oil for frying
Instructions for Perfect Crispy Chicken
- Slice each chicken breast horizontally to create thinner cutlets.
- Season both sides with salt and pepper.
- Set up three bowls: flour in one, beaten eggs + milk in another, and panko mixed with Parmesan and spices in the third.
- Dredge chicken in flour, dip into egg, then coat thoroughly in the breadcrumb mixture.
- Heat oil in a skillet over medium heat.
- Fry each piece for 4–5 minutes per side until golden brown and cooked through.
- Let the chicken rest on a wire rack.
Resting keeps it crispy. Skip that step and you’ll trap steam. Nobody wants steamed breading. 🙂
Homemade Caesar Dressing That Actually Tastes Good
Store-bought dressing works in emergencies. This isn’t an emergency.
When you make Caesar dressing from scratch, you get real flavor — tangy, garlicky, salty, creamy. Ever wondered why restaurant Caesar tastes sharper? Anchovies.
Don’t panic. They don’t make it fishy. They make it bold.
Ingredients for Caesar Dressing
- ½ cup mayonnaise
- 1 tablespoon Dijon mustard
- 1 tablespoon lemon juice
- 1 teaspoon Worcestershire sauce
- 2 anchovy fillets (mashed) or 1 teaspoon anchovy paste
- 1 clove garlic (minced)
- ¼ cup grated Parmesan
- Salt and black pepper to taste
Instructions
- Combine mayonnaise, Dijon, and lemon juice in a bowl.
- Add Worcestershire, anchovies, and garlic.
- Stir in Parmesan.
- Season with salt and pepper.
- Chill for at least 20 minutes before using.
That resting time lets flavors blend. It tastes ten times better after it sits.
Choosing the Best Bread for a Chicken Caesar Sandwich
Bread matters more than people think.
Soft bread collapses. Super crusty bread shreds the roof of your mouth. We need balance.
I recommend:
- Brioche buns for richness
- Ciabatta rolls for structure
- Toasted sourdough slices for bold flavor
I personally love ciabatta. It holds the crispy chicken and dressing without turning into a soggy mess.
Always toast your bread. Always. Butter the cut sides and toast until golden. This step protects the sandwich from sogginess and adds flavor.
Building the Ultimate Crispy Chicken Caesar Sandwich
Now comes the fun part.
Ingredients for Assembly
- Crispy chicken cutlets
- Toasted bread or buns
- Fresh romaine lettuce (chopped)
- Caesar dressing
- Extra shaved Parmesan
- Optional: crispy bacon, tomato slices
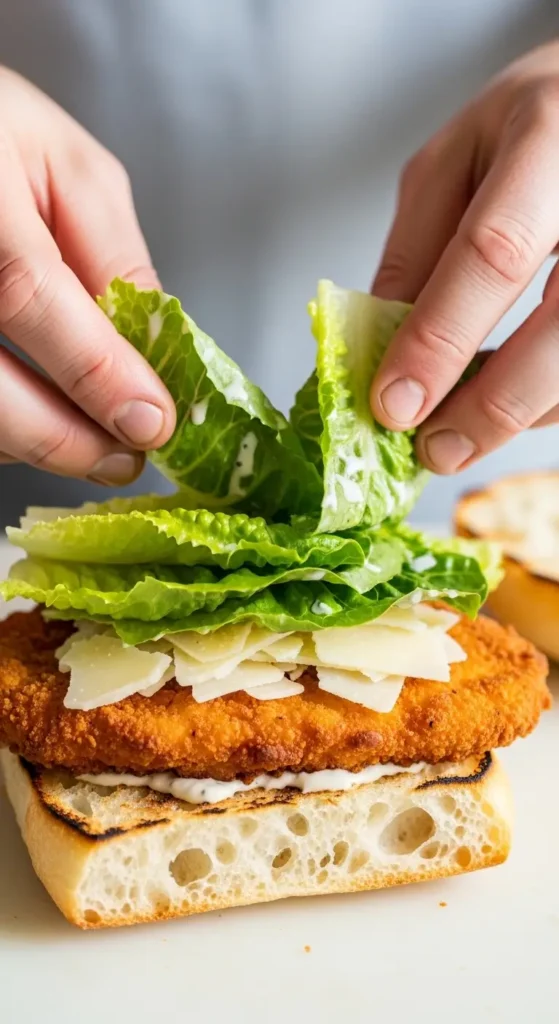
Step-by-Step Assembly
- Toss romaine with Caesar dressing lightly. Don’t drown it.
- Spread a thin layer of dressing on the toasted bread.
- Place the crispy chicken on the bottom half.
- Add dressed romaine on top.
- Sprinkle extra Parmesan.
- Add optional bacon if you want to show off.
- Close the sandwich and press gently.
Take a bite. Hear that crunch? That’s success.
Pro Tips for Maximum Crunch
Want your Crispy Chicken Caesar Sandwich to taste restaurant-level every time? Follow these:
- Use panko instead of regular breadcrumbs for better texture.
- Keep oil at medium heat so the crust doesn’t burn.
- Don’t stack hot chicken pieces — they steam each other.
- Dress lettuce right before assembling to avoid sogginess.
Ever noticed how some sandwiches feel wet? That happens when people assemble too early. Timing matters.
Air Fryer Version (Because We All Love Options)
Not in the mood to fry? I get it.
Ingredients (Same as Main Chicken Recipe)
Use the same breaded chicken cutlets.
Air Fryer Instructions
- Preheat air fryer to 375°F (190°C).
- Spray chicken lightly with cooking spray.
- Cook for 10–12 minutes, flipping halfway.
- Ensure internal temperature reaches 165°F (74°C).
The air fryer gives solid crunch with less oil. FYI, it won’t taste identical to deep-fried, but it comes close.
Spicy Twist: Buffalo Caesar Mashup
Feeling bold?
Add heat to your Crispy Chicken Caesar Sandwich.
Extra Ingredients
- 2 tablespoons buffalo sauce
- 1 tablespoon melted butter
- Extra black pepper
How to Make It
- Mix buffalo sauce and melted butter.
- Brush lightly over cooked crispy chicken.
- Assemble as usual.
You get creamy, spicy, crunchy goodness in one bite. Ever tried that combo? It slaps.
Make It Healthier (Without Losing Flavor)
Want a lighter version?
- Grill the chicken instead of frying.
- Use Greek yogurt in the dressing instead of full mayo.
- Choose whole-grain bread.
Grilled chicken won’t give you the same crunch, but it still tastes amazing. I switch to this version during the week when I feel “responsible.” Weekends? We fry.

Why This Sandwich Works So Well
Let’s break it down.
This Crispy Chicken Caesar Sandwich succeeds because it balances:
- Texture: Crunchy chicken + crisp lettuce
- Flavor: Salty Parmesan + tangy dressing
- Temperature: Hot chicken + cool greens
- Richness: Creamy sauce + toasted bread
Ever notice how boring sandwiches feel flat? They lack contrast. This one hits every note.
Common Mistakes to Avoid
I’ve made every mistake possible so you don’t have to.
- Overcrowding the pan when frying
- Skipping seasoning in the flour
- Using pre-shredded Parmesan (it doesn’t melt well)
- Adding too much dressing
Keep things balanced. The chicken should stay the star.
Storing & Reheating Tips
If you somehow have leftovers (impressive self-control), store components separately.
- Keep chicken in an airtight container in the fridge.
- Store dressing separately.
- Assemble fresh when ready to eat.
Reheat chicken in the oven or air fryer at 350°F until crispy again. Microwaving kills crunch instantly. Don’t do it. Seriously.
Why Homemade Always Wins
When you cook at home, you:
- Control ingredients
- Adjust seasoning
- Customize texture
- Avoid soggy disappointment
Plus, you skip delivery fees. That alone feels like a win.
I make this sandwich when friends come over, and it disappears in minutes. Everyone asks for the recipe. That’s when you know it’s good.
Final Thoughts: Your New Favorite Sandwich
This Best Crispy Chicken Caesar Sandwich – Better Than Takeout delivers crunch, flavor, and serious satisfaction. You get juicy chicken, bold dressing, fresh lettuce, and perfectly toasted bread in every bite.
Once you make this at home, takeout won’t hit the same. Why settle for soggy when you can create crispy magic in your own kitchen?
So tell me — are you frying or air frying first? Either way, you’re about to ruin basic sandwiches forever. And honestly? I support that.